Monday, April 15, 2024

Timecard GPS Integration with Sage Intacct

Hello everyone! Today we are proud to announce a new integration we have been working on, this time with Sage Intacct via Agave. As always, we are looking for ways to provide our loyal customer base with new tools and ways to interact with other powerful tools in the market, in order to give the most complete time capture and payroll solution available.


To enable the integration, of course you will need to have an account setup with Sage Intacct. Then, just go to the Administration tab and select "Integration via Agave", found in the Integration tab:


Here you can enable the auto synchronization of tasks, by ticking the checkbox for "Auto sync tasks:", then you can select the appropriate option according to your company's needs and configuration:


Once that is done, you can go to the Administration tab and access the "Maintain Task/Customer List" setting within the Basic section. When you open the dropdown menu, you will find a few new options that are meant to be used with this integration, where you can pull the projects and cost codes directly from the Agave Third Party system. Make sure to select the team or teams you want to load the tasks to and pick your desired option. In this case, we loading projects as tasks to our selected team:


Timecard will pull the appropriate list of projects and even has the capability to load addresses and External IDs. You will get a confirmation screen similar to this one, if everything looks good, click the "Confirm" button:

Click image to enlarge


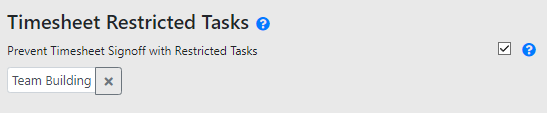
After the tasks are loaded, you can confirm it was done successfully by clicking on the team name back in the "Maintain Task/Customer List" section:


We will be providing more exciting updates about this topic, so stay tuned!


--Econz Team

Tuesday, March 19, 2024

Configuring Location Settings for Timecard GPS

Hello everyone! Today we have a quick and important guide for all of our mobile device using Timecard GPS customers. We are going to go over how to enable Location Settings to properly configure the Timecard application on mobile devices.

When first downloading and installing the app, after entering the device ID and the password, you will get the following disclaimer:


Timecard will give you a notice that the Location Settings are disabled, so hit "OK" to proceed:


On the next screen, you will be given the following options; make sure to select "Precise", then "While using the app", but there will be one more setting to enable, after this:


After this, when you attempt to clock in the first time, you will be given the option to set the "Location permission". It's very important to select "Allow all the time or Always" depending on device type to ensure the proper functioning of the application, which of course, that's what we all want to get paid properly!

Once that is done, you will be able to continue using the application normally and go about your day.

That's all for now! Let us know if you have any questions and our great Customer Support team will gladly assist you.


--Econz Team

Monday, February 5, 2024

Delay Processing Worker Termination in ADP

Hello everyone! In this article we want to cover a brand new setting we have enabled for our customer base who is integrating with the wonderful ADP system. As you probably already know, we have developed multiple features that go hand in hand with ADP, such as Cost Code Transfer and Cost Code Custom Mapping; this time, we want to focus on the cases of employees that are already setup with both ADP and Timecard, but have come to finish their time with the current company.

Of course, we all live in a time where employment fluctuation is a reality, and just as many new faces come to our organizations, others decide to look for greener pastures or even retire altogether. To make lives easier for the Management Staff (we are always thinking about you...!), we have come up with a feature that allows workers to remain synchronized to ADP for a duration of time after they are terminated in that system.

With this, you will be able to configure this to match either one or two payroll periods, and Econz will automatically match exactly what payroll period you have already configured. The purpose of this is to ensure that their timesheet will be processed and that they are paid for their last timesheet period at termination.

Let's see where to find this! First go to the Administration tab and look for the Integration section. Within it, you will find the "External Systems". Click on "Integrate With ADP":


Once inside, scroll down until you get to the "Time and Payroll Settings" section, and there you will find the option called "Delay processing worker termination in ADP":


You will be provided with three options:

  • No Delay
  • One payroll period
  • Two payroll periods
Make sure to select the one that applies to your company and click the "Submit" button to save it.

That's about it, with that out of the way, Econz Timecard will take care of this for you automatically!

Let us know if you have any questions or comments, and until next time...


--Econz Team

Tuesday, January 30, 2024

Days to display closed tasks

Hello everyone! We are back with more exciting details about what our wonderful application can do for you. This time, we want to talk about being able to display closed tasks. First we start off by talking about the ability to add a Start and End time on tasks, which will control for how long these will be displayed on an employee's device.

For example, we have a task called "Peanut Butter & Co.", which is scheduled to start on November 1st, 2023 and end on January 25th, 2024:


Setting up jobs like this will help employees focus only on the pertinent tasks, and avoids having them, as well as the people in charge of uploading the tasks list, to have to maintain these manually in case they handle long lists and don't want the field staff to have many jobs that are already expired. Using this feature, employees won't see the "Peanut Butter & Co." listed on their handset starting January 26th.

Of course, that's not all, as you probably noticed by the title of this article... What about the times that a project needs to be extended or worked on due to additional customer requests? Well, instead of having the job expire and deleting and re-adding it to the system, you can just stretch that time for as long as needed without having to make any additional changes to the project list. Just select how many days you need, and you are good to go!

To do this, go to the Administration tab and select Preferences. Then, look for the option called "Days to display closed tasks" and type the amount of days that the tasks should be displayed after they are closed:


Click on save, and that will take care of it!

We hope you like this feature, stay tuned for more tips to come...


--Econz Team

Monday, January 22, 2024

New Report: Field Worker Task List Report

Well, here we are again with a brand new report for your organization! As always, we are thinking of ways to make your lives easier, so we thought: why don't we create an easy way to show all tasks that employees have on their application? As we all know, job costing can get very complex, and even more so on a company that is growing or constantly getting new projects, so we wanted to provide a better way to view the big picture of what is going on.

Instead of going to the "Maintain Task/Customer List", which is better suited for managing jobs into teams or users, you will now be able to use the "Field Worker Task List Report"; and with just a few clicks, you will have all the necessary information.

Let's check it out! We would go to the Reports tab and look for the Administration section:


Once inside, you can select from the very well known options that Econz offers, such as generating a CSV or online-view report from a specific time frame; which is very useful if you are handling date based projects.


Here is an example of what the report looks like:

Click on image to enlarge

Let us know if you have any questions or comments, and until next time!


--Econz Team

Thursday, January 4, 2024

Timesheet Restricted Tasks

Hello everyone, today we have an interesting topic related to Timesheet Signoff: how to enable and use Timesheet Restricted Tasks. There might be the case where an organization needs to restrict employees from sending timesheets with certain tasks. These could be something like expired projects, or activities (subtasks) that an individual is not meant to work on, placeholder tasks that might be needed to integrate with another system, or it could even be extracurricular activities...!

Let's see how to set this up. First we go to the Administration tab and select "Configure Timesheet Settings" within the Staff section:


Scroll down until you find the "Timesheet Restricted Tasks" section:


If you want to prevent employees from signing their timesheet, tick the checkbox for "Prevent Timesheet Signoff with Restricted Tasks", otherwise, if it's left unchecked, then the employee would just get a warning prior to signing their timesheet.

Next, we have to select the Restricted Tasks. For example, we want to use "Team Building", so we search for it, then click the "Add" button:


After that, it will be added to the list of restricted tasks:


Finally, click the "Save" button at the bottom of the screen and you are done!


Let us know if you have any questions or comments; we have more exciting news coming up!


--Econz Team


Wednesday, December 20, 2023

Adding New Leave Types

Hello everyone,


Today we will be adding to our rich Leave Request functionality. We have always made it our goal to provide as much flexibility to our customers as possible, providing ways to make our own application, yours. So, of course, we want you to be able to customize multiple settings according to your own needs.


This time, we are talking about adding new Leave Types. We have the most common setup by default, but some companies may need to include an additional set of types of their own, so let's see how to add them to your company's profile!


First, we go to the Administration tab and select "Manage Leave Types", which can be found within the Staff section


On the next screen, you will be greeted by the default list of leave types, click the "Add New" button:


Add the name you wish to use and click the "Add New" button again:


When you go back to the previous screen, you will see all the default and added types. We have added a few additional types to our company:


The next time you add a Leave Request for an employee, all your leave types will be available for you to select:


That's it for now, stay tuned for more exciting updates and news about our features!


--Econz Team